Friday, January 29, 2021

Apricot Kernel Oil for the Skin


Apricot Kernel Oil is used for acne, dry skin, and skin inflammation. It has vitamin C and vitamin E which protects the skin. This oil is used as a carrier oil for aromatherapy or for massage therapy. It can be used for sensitive skin in moderation. Yet, this oil helps to moisturize the skin.

Also, Apricot Kernel Oil has a delicate scent, and it absorbs quickly on the skin. You can apply one to three drops of this oil onto your body lotion and massage your aching muscles. This oil will relax your muscles when used for massage therapy. Lavender, Clary Sage, and Peppermint essential oil can be blended with Apricot Kernel Oil. Here are more resources about Apricot Kernel Oil.

6 Apricot Oil Benefits & Uses for Beautiful Skin & Hair:

https://amaiaa.com/apricot-oil-benefits-and-uses-for-skin-and-hair/

Benefits of Apricot Kernel Oil for Skin:

https://bysarahlondon.com/blogs/journal-mindful-living/4-things-you-need-to-know-about-organic-apricot-oil#:~:text=Apricot%20oil%20helps%20to%20improve,and%20E%20working%20in%20partnership).

The Many Unknown Health Benefits of Apricot Oil:

https://doctor.ndtv.com/living-healthy/benefits-of-apricot-oil-health-hair-skin-and-more-1901232


* Free Essential Oil Clip Art:

* Free Apricot Clip Art Png:

* Background from: https://www.istockphoto.com/

* Fonts and Photo Editor  from Befunky


Thursday, January 28, 2021

Making a Puzzle (National Puzzle Day)


On January 29th, you or your child can make a paper puzzle for National Puzzle Day. First, you or your child can use a puzzle template from the Template lab website. After you printed the template, you can add a sheet of xerox paper to trace the puzzle pieces. But, before you or your child traces the puzzle pieces, your child can draw something to personalize their puzzle. Second, your child can color their design with colored pencils. 

After everything is drawn and colored, your child uses a marker to trace the puzzle pieces. Third, your child cuts the puzzle pieces and puts the puzzle together. Also, you or your child can glue the paper puzzle pieces onto cardboard or construction paper. After it is glued, their puzzle can be framed in their room. Simply, trim off the edges and frame the puzzle.

Last, you can take a picture or scan their puzzle drawing before they cut the puzzle pieces. In this way, you can make a scrapbook page with the photos of their puzzle drawings. Additionally, you can make a scrapbook page using your child's favorite color and include a picture of them putting a jigsaw puzzle together. Making paper puzzles will help your child to use their imagination and create art. Here are more resources for National Puzzle Day. 

19 Printable Puzzle Piece Template:

https://templatelab.com/puzzle-piece/

National Puzzle Day-Puzzles to Play:

https://puzzlestoplay.com/national-puzzle-day-2021/

Free Online Jigsaw Puzzles:

https://www.jigsawplanet.com/


* Free fonts and borders from Pizap

* Free Puzzle Template from Template lab


Monday, January 25, 2021

DIY Hand Painted Dish Soap Dispenser


Today's painting tutorial is painting dish soap dispensers. Painting dish soap dispensers will give your kitchen a cheerful look. Additionally, the dish soap dispenser can remind you to refill the dispenser and not to throw away the plastic dispensers. You can personalize your plastic dish soap dispenser by painting flowers or any design to go with your kitchen decor. Here is the tutorial for painting your dish soap dispenser.  

Materials:

Acrylic Paint

Paint Brushes

Empty Dish Soap Dispenser

Clear Top Coat Paint

Stencils (optional)

Permanent Marker

Glitter Nail Polish (optional)

First, remove the labels from the dish soap dispenser. Second, wash and dry the empty dish soap dispenser. Third, use a stencil or write the word, "Dish" with a permanent marker. Fourth, draw or use stencils to draw the flowers with a permanent marker. Fifth, paint the letters with one acrylic paint color. 


Wait for the paint to dry. Sixth, paint the flowers with different acrylic colors. Wait for the paint to dry. After that, you can add glitter nail polish to emphasize the abstract flowers or any other painted design. Then, paint a clear topcoat of paint. Wait for the topcoat to dry. Last, refill the dish soap dispenser with your dish soap. 


* Free fonts and borders from Pizap

Sunday, January 24, 2021

Free Coloring Notes Printable


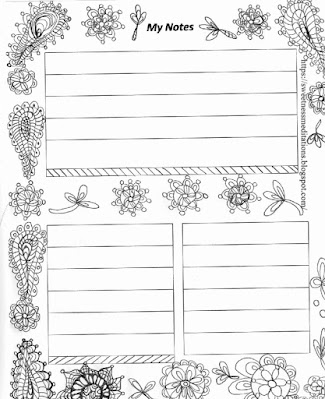
These note pages will help you to focus and to help you remember anything. Each free coloring page come in three different designs with lines. Each box can be labeled and personalized for your personal notes. Also, you can add numbers or your own bullet points in each box to organize your notes. Two coloring pages have flower designs on them, and the third coloring page has a paisley design on it. These coloring note pages are free and for your personal use. 


* Free fonts and borders from Pizap

Saturday, January 23, 2021

DIY Bracelets with Jump Rings


Jump ring bracelets are so easy to make with leftover beads. Also, if you have a broken dangle disc or dangle circle earrings, it can be added to the bracelet. Adding nail polish can also cover an existing color from the dangle circle or disc earring. But, nail polish is optional in this jewelry tutorial. Here is the tutorial for making these bracelets. 

Materials:

14 or 15 jump rings

Pearls and beads

Jewelry Pliers

Lobster clasps

Nail Polish (Optional)

Broken Earrings that have a circle disc

Headpins 


First, gather all of the materials to make your bracelets. Second, open one jump ring and insert a lobster clasp. Third, close the jump ring with the lobster clasp. Fourth, insert a bead into a headpin. Fifth, wrap the headpin with the bead. Continue adding beads with the headpins. 

Sixth, add a jump ring to the beaded headpin. Then, close the jump ring. You will need approximately fourteen or fifteen jump rings; Depending on the size of your wrists and the size of the beads or pearls. Alternate the jump rings with beads or pearls. Once the bracelet fits around your wrist, you can add a circle disk or dangle circle onto the bracelet. 

Nail polish was used to cover an existing color onto the dangle circle or disk. Let the nail polish completely dry onto the disc. Insert a jump ring to the disc and the bracelet. Close the jump ring. After that, you can wear your new handmade bracelet. 


* Free fonts and borders from Pizap

Friday, January 22, 2021

Inspire Your Heart with Art Day


On January 31st, inspire your heart with art. On this awareness day, surround yourself with art such as photography, paintings, or posters. Also, you can make your artworks to decorate a room. You do not need to paint on canvas to make your paintings. Instead, you can paint on paper or wood to create a new decorative look to any room. 


Making art is a good way to reduce stress. Listen to music or watch a fine arts performance online. Sketch or doodle with a crayon, pen, or a color pencil without worrying about how your art is going to come out. Draw without feeling pressured in making it look perfect. Express how you feel through your artwork.


Another way to celebrate this awareness day is by taking pictures of nature. You can also take a virtual tour of museums online. Learn a new dance or teach yourself new art skills. Share your art with your family members on Zoom or social media. Here are more resources about Inspire Your Heart with Art Day. 


Inspire Your Heart with Art Day:

Inspire Your Heart with Art Day:

12 Ways to Make an Art Studio at Home:


* Free borders and fonts from Pizap


Tuesday, January 19, 2021

DIY Pendants with Head Pins


In the Stone Age, pendants were made from stones, shells, and teeth. However, in the Egyptian era, pendants were made from gold and had hornets, flies, or serpents. Later, gold coins, cameos, and engravings were used as pendants in the Roman era. Over time, pendants were made from pearls, rubies, diamonds, and rhinestones. Also, beads were used to make pendants. 

Making your pendant creates a personal fashion statement and your creativity. These pendants were made from beads, headpins, and jump rings. It will take approximately thirty or forty minutes to make your pendants with headpins. After making your pendants, you can insert them into a chain or a cord necklace. Here is the tutorial for making these pendants. 

Materials:

Jewelry Pliers

Beads-any color

Head Pins 

Chain or cord necklace

Jump rings 


First, bend two headpins into a round shape. Second, connect two bent headpins with headpins. Third, repeat the same step for the other side of the pendant. You will need four headpins bent in a round or oval shape. It will look like you are creating wings out of metal wire. Fifth, once you have the four header pins into the shape of two wings, connect the four headpins with jump rings.

Sixth, insert beads into one straight headpin. This pendant has five small red beads. But the number of beads will vary depending on the size of the beads. Seventh, close the headpin by making a loop with jewelry pliers. Add about three medium-size jump rings to the beaded headpin and close the jump rings with the pliers. After that, you can insert the beaded pendant into a chain or a cord necklace. 


Materials:

Head Pins

Jewelry Pliers

Beads 

Jump Rings

First, use three headpins to make this pendant. Bend two headpins in the shape of a letter. In this example, I bent the headpins to make a letter, "M". Second, connect the two headpins with another headpin. Wrap the third headpin to connect the two bent headpins. Next, make a loop at the end of the headpins.

Third, insert jump rings into the loops. Fourth, use another headpin and insert one bead. Wrap the bead. I used five red beads wrapped in a head pin individually except one headpin has two beads wrapped together. Last, insert each bead to the three sides of the letter, "M". Then, add one jump ring to the pendant and insert a chain or a cord necklace. Below are links about the history of pendants and making pendants. 


How to Make a Pendant-45 DIY Pendant Projects:

Sunday, January 17, 2021

Tips for Having a Safe Bath (National Bath Safety Month)


Approximately, thirty percent of people fall from their bathtubs annually due to wrong equipment or the equipment was not professionally installed. Usually, the grab handles had a loose screw or there were shard edges left on tiled walls which can cause bathroom injuries. Since January is National Bath Safety Month, it is necessary to make sure that everything is installed properly and that sharp edges are covered. Also, make sure that bathtubs are not slippery to prevent falls.

Using the wrong bathmat can lead to falling in the bathtub. Yet, when choosing the right bathmat, make sure the bathmat has a slip-resistant material on the back. Keep electric appliances and electric outlets away from the bathtub. Organize all your toiletries in an area that can be easily reached from your bathtub such as soap, shampoos, loofah sponges, etc. Make sure the grab handles and towel rails are tightly screwed so you can safely hold on when you stand up slowly from the bathtub.

Make sure you have plenty of walking space from the bathtub, sink, and the toilet. Check the lights in the bathroom and have a night light in the bathroom. Additionally, make sure that the bathtub is clean and has no residue from bubble baths, bath oils, or from bath bombs. Last, make sure that water does not leak from your bathtub and from your bathtub doors. Here are more resources about National Bath Safety Month and tips to prevent bathroom injuries. 


Everything You Need to Know to Prevent Falls in the Bathroom:
https://www.thenorthernlight.com/stories/everything-you-need-to-know-to-prevent-falls-in-the-bathroom,15690#:~:text=Bath%20mats%20can%20contribute%20to,faced%20tape%20for%20added%20security.&text=Limit%20moisture.,from%20getting%20on%20the%20floor.

Bath Safety Month:

https://www.navigatehousing.com/national-bath-safety-month/#:~:text=January%20is%20National%20Bath%20Safety,of%20falling%20and%20injuring%20themselves.

4 Tips for National Bath Safety Month:

https://www.scholastic.com/parents/family-life/parent-child/4-tips-national-bath-safety-month.html

3 Tips for National Bath Safety Month:

https://www.bentleybaths.com/being-vigilant-top-3-tips-for-national-bath-safety-month/


* Bathtub Refinishing Bathroom Hot Tub Clip Art:

https://www.cleanpng.com/png-bathtub-refinishing-bathroom-hot-tub-2398193/


* Free fonts, backgrounds, and borders from Pizap


Friday, January 15, 2021

National Hobby Month at Home


It is National Hobby Month! You can celebrate National Hobby Month by making craft projects for yourself or for the interior of your home. You can go through your old jewelry pieces from your jewelry box and repair your old jewelry. Often, you can make old jewelry look new by making pendants out of broken string bead necklaces. Today, I have created a bead heart pendant by recycling the beads from a broken bead string necklace.

You can make a few pendants and use the same chain link necklace to create a different necklace to go with your outfits. In this example, I used lobster clasps to remove the pendant from the broken chain. However, you can use jump rings and a chain that is not broken to create several beaded pendants. Then, you can clean the chains separate from the pendants. Here is the tutorial to make this bead heart necklace. 


Materials:

Broken chain link necklace

Jewelry pliers

8 Jewelry head pins

2 Lobster Clasps

4 Jump rings

Beads

First, insert two or three beads onto a head pin. Wrap the beads with the head pin. Repeat the same step. Second, connect the two beaded head pins together with another head pin. Wrap the head pin with the beaded head pins. Third, continue adding beads to head pins. You will need approximately eight head pins to complete the bead heart pendant. However, it depends on the size of the beads. Fourth, you will need to bend the head pin to make a heart shape as you continue adding the beads together. Continue wrapping the head pin with the beads until it forms into a heart. Fifth, wrap all the blank head pins that were used on each side of the beaded heart.

When the beaded heart is complete, insert one jump ring and a lobster clasp into the section of the wrapped wire. Close the jump ring and lobster clasp with the beaded heart with jewelry pliers. Repeat the same step for the other side of the beaded heart. After that connect the lobster clasps together with the broken chain link. Add jump rings to the ends of the chain to make it easier for the lobster clasps to hold the pendant with the chain.

Now, you can wear your recycled bead heart pendant necklace. Instead of jewelry head pins, you can use jewelry wire to make the shape of the heart to make the beaded heart pendant. You can use different color beads to make your beaded heart pendant or use the same color beads. Nevertheless, have fun making these bead heart pendants. Below are resources about National Hobby Month and making a bead heart pendant with jewelry wire. 


National Hobby Month:

https://blog.healthalliance.org/national-hobby-month/

Let's Find a Fun Hobby for You with this Quiz:

https://www.proprofs.com/quiz-school/story.php?title=find-fun-hobby-you

Happy National Hobby Month:

https://omaha.momcollective.com/home-lifestyle/happy-national-hobby-month/

How to Make a Bead Wire Heart Pendant:

https://www.goldenagebeads.com/blog/how-to-make-a-bead-wire-heart-pendant.html


* Free fonts, borders, and backgrounds from Pizap


Thursday, January 14, 2021

DIY Drop Earrings

Wearing drop earrings make any dress or a two-piece outfit look elegant. All you will need are beads or pearls along with broken chains to make your drop earrings. Making drop earrings only take a few minutes to do. You can use stud earrings or earring hooks to make your drop earrings. In this tutorial, I used earring hooks to make these drop earrings. 

The first drop earrings are made of pearls and broken gold chains. The second drop earrings are made of pink beads and silver chains. However, you can use any color bead or pearls for your drop earrings. Using the wire wrap technique, you will have fun making these earrings. Here is the tutorial for making these drop earrings. 


Materials: 

4 Broken Chains 

4 Pearls

2 Earring hooks

8 Jump rings

Jewelry pliers

4 Jewelry Head Pins and Eye Pins


First, find the length that you want the chains to hang on the earrings. Second, cut the first two links of the chain. Third, make sure each chain is the same length and add two chains to each earring hook. Use one jump ring to connect the chains and the earring hooks. Fourth, use a jewelry head pin and insert the pearl. Wrap the two sides of the pin and make sure the pearl stays in the center of the pin. 

Repeat the same step for the second pearl. Fifth, use a jump ring to connect the pearl onto a chain. Repeat the same step for the second chain. Last, use another jump ring to insert the second chain onto the earring hooks. Repeat the same steps for the second earring. One chain will hang down more than the other chain making the two pearls hang in different lengths. 


Materials:

Jewelry Pliers

4 Jewelry Head Pins and Eye Pins

4 Beads

2 Broken Chains

4 Jump Rings


First, cut the broken chains into the same length. Second, insert one head pin with one bead and wrap the two ends of the pin. Make sure the pin stays in the middle of the head pin. Third, insert one jump ring with the bead and one earring hook. Fourth, wrap another bead with another head pin and one small chain on both ends of the pin. Fifth, insert another jump ring with the bead that has the chain onto the bottom of the first bead. Repeat the same steps for the second earring hook. Have a great time making your drop earrings. 


* Free borders, collages, and fonts from Pizap


Tuesday, January 12, 2021

What is Kundalini Yoga?


Kundalini yoga takes practice and mastery which uses mantras, mudras, and breathing techniques. It enables the movement of energy to flow. Kundalini yoga begins with the energy that can not flow based on the spine. It uses mudras which are hand gestures. Different mudra gestures are used for energy and for lucidity of the mind. Before doing Kundalini yoga, you can meditate deeper and do breathing exercises.

Kundalini yoga has three aspects which requires chanting, meditation, and being aware of your breathing. Also, knowing about chakras will help you understand how energy flows through the body. Chakras are disks of energy that are located along the center of your spine which receive and send out energy to your organs. By releasing energy that is stuck through yoga poses, you will feel awaken and energetic. Each yoga pose is repeated which connects your consciousness with yourself and helps you understand yourself. Here are more resources about Kundalini Yoga. 

Kundalini Yoga 101-Everything You Wanted to Know:

https://www.mindbodygreen.com/articles/kundalini-yoga-101-everything-you-wanted-to-know

Kundalini Yoga-Poses, Benefits, Steps for Beginners:

https://www.healthline.com/health/kundalini-yoga

A Beginner's Guide to Kundalini Yoga: 

https://www.yogajournal.com/yoga-101/a-beginners-guide-to-kundalini-yoga/

What are Chakras:

https://www.healthline.com/health/what-are-chakras

10 Powerful Meditation Mudras and How to Use Them:

https://chopra.com/articles/10-powerful-meditation-mudras-and-how-to-use-them


* Courtesy Photo from: Photo by Prasanth Inturi from Pexels

* Free clip art and borders from Pizap


Saturday, January 9, 2021

Free Heart Coloring Pages


Today, I have created four hand drawn heart coloring pages. Three coloring pages have different flowers such as lilies, roses, and other flowers. The fourth heart coloring page has flowers and circles.  These coloring pages can be used for Valentine’s Day, Mother’s Day, or for any other occasion. Enjoy!


* Free fonts and borders from Pizap


Friday, January 8, 2021

Meditation at Night


Prepare your room before you meditate at night by having clean washed sheets on your bed. Also, a clean washed pillowcase. Next, have two pillows to elevate your head or a neck pillow. Additionally, a contour pillow helps to alleviate neck pain before meditating. Once you are in a comfortable position, begin breathing slowly. 

Focus on your breathing. Slowly, close your eyes. Think of a peaceful place such as a beach, garden, or a place that brings you good memories. Continue breathing slowly.  Listen to a recording of guided meditation, waterfalls, or nature sounds.

Imagine yourself in that peaceful place. Sitting or lying down on the sand. Listening to the ocean sounds or the bird's chirp. Feeling the warmth of the sun. Last, feeling the ocean water on your feet.

If that does not help you fall asleep, use a word, phrase, or a short quote. However, if bad dreams keep you awake at night, write down your dreams. Keep a notebook or journal near your bed to write down your worries, fears, and bad dreams. Wear comfortable pajamas and think about good memories that left you feeling upbeat. Seek professional help if you still cannot sleep at night. Here are more resources about guided meditation and meditating at night. 

Getting Started with Guided Meditation:

https://www.verywellmind.com/guided-sleep-meditation-getting-started-4174316

Best Guided Sleep Meditation:

https://www.nestmaven.com/sleep/aids/best-guided-sleep-meditation/

Mindfulness Meditation Helps Fight Insomnia and Improves Sleep:

https://www.health.harvard.edu/blog/mindfulness-meditation-helps-fight-insomnia-improves-sleep-201502187726


* Free fonts and borders from Pizap

Wednesday, January 6, 2021

Free Crocus Coloring Bookmarks


Today, I have created four coloring bookmarks inspired by the saffron crocus flower. The saffron crocus blooms in autumn. The saffron crocus is also known as autumn crocus. There are fifty variations of crocus flowers that bloom in spring or autumn. These bookmarks are free and for your personal use. Have fun coloring these bookmarks. 


* Free fonts and borders from Pizap